Friday, September 28, 2007

Using Google Maps and Solid Capture to Create Directions

Google Maps is a powerful tool for getting directions. You can map out a route, change it as needed and quickly print it out for the road. In addition, you can also use it to e-mail directions to your friends and colleagues.

You can also use Solid Capture in conjunction with Google Maps to capture all or part of a route for use in a document or an e-mail.

Creating Directions in Google Maps.

First, go to http://maps.google.com.

In the window that appears click "Get directions". Type in the starting address in the Start address field and type in the destination address into the other field. Click "Get Directions" and you'll see your route:


(Click image for full size view)


(The first route from Google Maps)

The default route isn't always the best way to go, especially if traffic or construction is in the way. If you want to change your route, just click and drag the purple line to alter it:


(Moving the route)


(The new route)

You can do this multiple times as needed:


(The scenic route)

Taking a Screen Capture of the Map.

You can use Solid Capture screen capture to turn this map into an image you can e-mail (or paste into a Word DOC or whatever else strikes your fancy).

In Solid Capture, click the Rectangle Capture button and then click and drag over the area you wish to capture. Your result should look similar to this:


(Solid Capture, click image for full size view)

This screen capture may be pasted directly into an e-mail, or dragged into Microsoft Outlook as an attachment.

A screen capture is useful, but you may also need a link to the map itself. In Google Maps, click "Link to this page". The URL that will be created can be pasted wherever you need it:


After pasting the link to Google Maps and your screen capture into an e-mail your result might look like this:


(Click image for full size view)

Friday, September 21, 2007

Pasting Unformatted Text in Microsoft Word

The clipboard in Microsoft Word is very powerful. It has the ability to copy and paste most of the formatting from other Microsoft Office applications, as well as much of the formatting from a website.

This isn't always what you want, however. Sometimes you simply want the text without any extra colors, fonts or other features.

Doing this in Word is fairly simple. To paste unformatted text into Microsoft Word 2003, go into Edit | Paste Special | Unformatted Text | OK.

In Word 2007, go into Home | Paste | Paste Special | Unformatted Text | OK.

This is fine if you need to perform this every once in a while.

If you plan on using the feature frequently, you'd be well served by creating a macro for this and binding it to a keyboard shortcut. If you're new to creating macros, check out our more general post on creating Word macros before trying the one below.

Writing a Macro to Paste Unformatted Text in Word 2003 and 2007.

- Word 2003

Go into Tools | Macro | Macros | Name your macro "PastePlainText" (without quotes) and click Create.

If you don't like PastePlainText, you can name this ASeriesOfTubes [wikipedia.org] for all Word cares. Just make it unique and you'll be ok.

- Word 2007

Go into the Developer Tab, then Macros. Name your macro, then click Create.

If you don't have the Developers Tab in Word 2007 you can enable it by clicking on the Office Button | Word Options | Popular | Check "Show Developer tab in the Ribbon".


(The Office Button in Word 2007)

- Word 2003 and 2007

Microsoft Visual Basic will appear, and you should see the start of your Macro in the center window:


(Click image for full size)

You should see code that looks very similar to the code below:

Sub PastePlainText()
'
' PastePlainText Macro
' Macro created 9/21/2007 by Solid Documents
'

End Sub

Change this to:

Sub PastePlainText()
'
' AutoClose Macro
' Macro created 9/21/2007 by Solid Documents
'
Selection.PasteAndFormat (wdFormatPlainText)
End Sub

(FYI, the lines that start with single quotes (') are comments. Nothing on a line that comes after ' will be run in your macro. This is useful to document how a macro works, as well as to remind yourself 6 months from now just what this macro called "ASeriesOfTubes" was supposed to do in the first place)

Next, go into File | Save Normal. Close the window.

- Word 2003

Go into Tools | Customize | Keyboard | Categories | Macros | Select PastePlainText (or whatever you named your macro).

- Word 2007

Click on the Office Button | Word Options | Customize | Customize Macros | Select PastePlainText (or whatever you named your macro as).

- Word 2003 and 2007

Click in the "Press new shortcut key" field and type the shortcut that you want to use. Ctrl+shift+v is a nice choice, given that you will be pasting something.

Click Assign, then in Word 2003 click Close | Close (in Word 2007 click Close | OK).

Your macro has been created, and you have assigned it to a keyboard shortcut. Try copying and pasting some text using your new shortcut. If you see any errors, go back and make sure you don't have any typos in your macro.

Thursday, September 20, 2007

Copying Formatting in Word using the Format Painter

One of our favorite tools (besides PDF to Word, of course) is the Format Painter in Microsoft Word. Although this feature is fairly well known, it deserves mentioning again due to just how much time you can save with it.

Basically, you use the tool to copy all of the formatting from one selection of text to another. This is usually much faster than going through several menus to apply different formatting options to a section of text. Even when it isn't that much faster, it's nice to let Microsoft Word do the hard work for you.

How to use the Format Painter in Word:

Select the text with the format you wish to copy. Next, either click or double click the Format Painter:


(in Word 2003)


(in Word 2007)

If you single click the Format Painter icon, you can click and drag over a selection of text once to copy the formatting. Your cursor will change back to normal and you can continue working.

If you double-click the Format Painter icon, you'll be able to do copy the formatting to as many selections of text as you like. To stop using the Format Painter after double-clicking it, just click the icon again (or press escape).

If you're using Word 2007 and find yourself using this feature frequently, right click Format Painter icon and select "Add to Quick Access Toolbar". Now it will be available regardless of what part of the ribbon that you're in:


Finally, this feature is also available in Microsoft Excel and PowerPoint, so feel free to give it a shot in those programs as well.

Wednesday, September 19, 2007

Free Software for Students and Teachers: Solid Capture

We're giving away Solid Capture - FREE - to students and educators. What's the catch? Just this - download and unlock our software using an e-mail address from an educational institution. Then it's yours to use or recommend to a friend.


(Click Here to Download)

Free Software: Helping Education and Companies

We at Solid Documents are taking a small step to help cut the burden of rising education costs by making software free to students and their instructors. Solid Capture is very useful to students who need to use screen shots and browser captures to extract information or illustrate reports.

Companies also benefit in many ways. All companies rely upon well-educated employees and customers who can understand and use technology, so it benefits everyone to support students in their endeavors to receive the highest quality technology education possible.

For a limited time, we are offering Solid Capture free to any e-mail address that ends in an educational institution extension (.edu, .k12, ac.uk, .sch.uk, etc). Each e-mail address is entitled to download one copy of the program, free of charge. If you have such an e-mail address (or know someone who does), please forward this post to them.

Restrictions: the license is strictly for non-commercial use, is non-transferable, and applies to the current release only. Other than that, students and educators are free to use the software for whatever purposes they need.

We hope students and teachers will enjoy this offer and look forward to hearing how Solid Capture is being used in educational institutions throughout the world!

Tuesday, September 18, 2007

Creating Fillable Forms using Solid Converter PDF

Given how digitized most workplaces have become, printing out a PDF form and filling it in with a pen seems odd (and time-consuming). Why did you print it out? Because someone sent you a PDF file that you cannot fill out in Adobe Reader.

This can be a pain, but it doesn't have to be. You can use Solid Converter PDF to Word to convert the PDF file into a Word DOC which may be filled in like any other DOC file.

Converting your PDF form to DOC:

Right click the PDF file and select Solid Converter PDF | Convert using Wizard.

In the window that appears, set "Layout and Formatting" to Exact and click Last | Finish.


(click image for full size)

After the PDF is converted, the converted Word DOC should appear in Microsoft Word automatically (assuming that you haven't changed this default setting).

- If your PDF file was not made from a scanned document, you should be done at this point. Click into the fields that you want to fill in and type away.

- If your PDF file was made from a scanned document, you will likely have a series of flat images in your Word DOC.

By itself, this isn't very useful. However, after adding text boxes you'll be able to fill it in easily.

- In Microsoft Word 2003 go into Tools | Options | General | Uncheck "Automatically create drawing canvas..." and click OK:


Next, go into Insert | Text Box | Click and drag where you want to draw the text box, then release.

- In Microsoft Word 2007 go into Insert | Text Box | Draw Text Box | Click and drag where you want to draw the text box, then release.

- In both Word 2003 and 2007 A text box will be created that you can fill in. Unfortunately, it isn't transparent and it has a black border.

Type some sample text into the text box ("Type your text here", for example), then right click one of the edges of the text box and select Format Text Box.


(Selecting Format Text Box in Word 2003)

In the Window that appears, go into the Colors and Lines tab. Under Fill set Color to "No Fill" ("No Color" in Word 2007) and under Line set Color to "No Line" ("No Color" in Word 2007) .


(The Format Text Box window in Word 2003)

Click OK. You text box will be transparent, excluding the sample text you entered.

Right click the edge of the text box and select Copy, press escape twice and go into Edit | Paste (Home | Paste in Word 2007). Move the text box to a field and resize it if needed.

Keep pasting and moving text boxes until you have text boxes over all of the fields in the document. After that you can fill in your document.

Monday, September 17, 2007

Word Tips: Changing Default Margins and Layout in Word

Unhappy with the default settings of Microsoft Word? You can save time and energy if you reset some of the default settings of the program to match what you most frequently use.

Do you find yourself constantly having to re-set the page margins because the default setting leaves too much white space for your liking?

You can easily change the default margins to come up the same each time you start a new document in Word 2003 by choosing File-Page Setup-Margins.


Here you can adjust your margins how you would like them to be and click the default button at the bottom.


Click yes to allow the change.


Word 2007 makes it easy to make the same changes:

In the ribbon, click the Page Layout tab.
Click the Margins tool in the Page Setup group.
Click Custom Margins.
Change your right and left margins to one inch (or whatever setting you need).
Click the Default button.
Click Yes.


References:
http://office.microsoft.com/en-us/word/HP052292751033.aspx

http://articles.techrepublic.com.com/5100-10877-6176730.html


Page views:
Everyone has individual preferences for how they like their Microsoft Word documents to look on their screen while working. Some people really like the Reading Layout feature in Microsoft Word (why else would they send you documents that use this by default?). Other people dislike it when Word opens up this way, and they find themselves racing to hit the escape key when this happens.
If you really do not like the reading Layout, you can ask Microsoft Word to not open any documents in that view by choosing Tools-Options-General and un-checking the box next to “Allow starting in Reading layout”.


Other layouts can be trickier. There are options for Normal, Web, Print, Reading and Outline on the View menu. If you choose one of these options for your document, you can then save it and it will always open this way. If you receive a document from someone else, you can change the view while you have it open, however the default view when you open the original will always be however it was created as this is saved with the document information.

Wednesday, September 12, 2007

Creating Encrypted PDF files using Solid Converter PDF

PDF files can contain information with varying levels of sensitivity.

You may have flyers that you wish anyone and everyone to open, print and use as needed. Or you may have documents that only a few key individuals should be able to open. You may also have files that you want people to be able to view, but not change using a PDF editor (invoices come to mind, as you don't want people to remove a couple zeros from a bill you sent them).

PDF files can be secured easily, restricting the options of most users. Please note that no encryption technology [wikipedia.org] is perfect, and there is software available that people can use to illicitly crack PDF files. The steps below can make it much harder for people to open or alter your documents, but they will not make it impossible.

This guide assumes that you have Solid Converter PDF v3 Professional installed. If you have not purchased the program, you can download a free 15 day trial [soliddocuments.com].

1. Open the document you wish to convert to PDF and go into File | Print | Select the Solid Converter PDF printer driver and click OK.

Below is an example window of what this looks like in Microsoft Word 2003:


2. In the window that appears, select the name and location of your PDF file, check "Prompt for password and security settings" and click Create:


The next window that appears will have several security options. If you feel intimidated don't worry; we'll narrow down things very quickly.


(Configuring security settings in a PDF file using Solid Converter PDF to Word)

3. First, determine if you need to prevent someone from opening your new PDF file without a password, or doing something with the PDF without a password (print, edit, extract contents, etc).

- If you need to do the former, check "Require user password to open the document" and enter a user password. Anyone who wants to open the PDF file in Adobe Reader will need this password.

- If you need to do the latter, check "Use owner password to restrict printing, editing and extraction". Next, enter an owner password and uncheck the items that you don't want people to do.

You can restrict:

  • Printing (printing the document to a paper printer, for example).
  • Editing of contents (changing the PDF file using a PDF editor).
  • Copying and extraction of contents (to prevent copy/pasting from the PDF file, or using a program to convert the PDF to DOC).
  • Adding or editing of comments.
4. Finally, you can set the encryption level at the top of the window. If you select either password option it will automatically default to "High (128-bit RC4)". Opening this kind of file requires Adobe Reader 5.0 or higher.

If you want to apply a stronger encryption method, select the drop down menu next to Encryption Level and select "High (128-bit AES)". This requires that viewers of the file have Adobe Reader 7.x or higher installed (you may download the latest Adobe Reader for free [adobe.com]).

Finally, you can select a weak encryption method (40-bit RC4), but we don't recommend this, unless you have to make the PDF file display in Adobe Acrobat 3 or 4.

5. Once you've setup how you want to secure the PDF file, click OK and the file will be created.

Monday, September 10, 2007

Creating Macros in Microsoft Word 2003 and 2007

Every day you use Microsoft Word, you probably perform at least a few repetitive tasks. From changing multiple formatting options in your document to inserting text, you have the ability to significantly speed up your work through the use of macros.

What is a macro you ask? Simply put, a macro is sequence of actions. You can use Microsoft Word to record a time consuming task in a macro. When you need to perform the task in the future, just run the macro to have Word do it automatically.

- How to Create Macros:

- Microsoft Word 2003

Go into Tools | Macro | Record New Macro:


Name your macro, and select if you want to assign it to a keyboard shortcut or to a toolbar.


(The Record Macro window in Microsoft Word 2003)

If you assign it to a keyboard shortcut, you'll need to type in your shortcut in the window that appears. Using Ctrl+Shift and a letter or Ctrl+Alt and a letter are usually safe to use.


(The Customize Keyboard window in Microsoft Word 2003)

If you assign it to a toolbar, you'll need to drag the command to where you want it, then release:


Next, perform the actions you want in the macro. You may want to do this slowly and deliberately, as everything you do in Word will be recorded. Once you're done, click "Stop Recording" and the macro will be complete:


Test out the macro and make sure it performs as expected (Do make a backup of any file you test it on). If it works, great! You are now using one of the most powerful features of Microsoft Word.

If it doesn't work the way you want it to, you can always delete it by going into Tools | Macro | Macro | Select the macro you want to delete and click Delete. After that, you can try making the macro again.


- Microsoft Word 2007

If you haven't yet turned on the Developer tab, go into Microsoft Word | Office Button | Word Options | Popular | Check "Show Developer tab in the Ribbon" and click OK.


(Enabling the Developer Tab in Word 2007)

Go into the Developer tab, and in the Code group click "Record Macro":


Name your macro, and select if you want to assign it to a keyboard shortcut or to a toolbar. This looks the same as the Record Macro window in Word 2003.

If you assign it to a keyboard shortcut, you'll need to type in your shortcut in the window that appears. Using Ctrl+Shift and a letter or Ctrl+Alt and a letter are usually safe to use.

Perform the actions you want in the macro and click "Stop Recording" in the Code group of the Developer Tab:


Next, test out the Macro and make sure it performs as expected (Make a backup of your test file prior to using the macro, you never know when things may go awry). Should it work the way you want it to, give yourself a pat on the back.

If the macro doesn't do what you want it to, you can always delete it by going into the Developer Tab, then into the Code group and select Macros. Select the macro that doesn't work correctly and delete it, then try making it again.


- References:

office.microsoft.com: Write or record a macro.

homeandlearn.co.uk: Microsoft Word Computer Course.

Tuesday, September 4, 2007

Common Word Annoyances

Using Microsoft Word can be amazing. It makes some tasks so easy that you can’t imagine using another word processor. It can also be a bit too helpful at times:


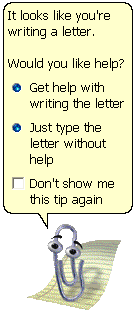
(Clippy, the Office assistant available in Microsoft Office 97-2003)

From hiding menus you don't use every day to automatically "correcting" your text, you can spend a good deal of time fighting the program rather than creating content. Below is a list of some of our least favorite default settings:

- The first letter in every sentence is capitalized automatically.

While capitalizing the first letter in every sentence is a common writing style for most European languages, it doesn’t always apply to what you might be writing about. Instead of having to undo the capitalization that Word “corrected” for you, you can turn this feature off so that you control when capitalization occurs.

How to fix:

- Word 2000

Go into Tools | AutoCorrect | AutoCorrect | Uncheck the "Capitalize first letter of sentences" box.

- Word XP/2003

Go into Tools | AutoCorrect Options | AutoCorrect | Uncheck "Capitalize first letter of sentences" and "Capitalize first letter of table cells".


(Disabling some of the automatic capitalization features in Office 2003)

- Word 2007

Go into the Office Button | Word Options | Proofing | AutoCorrect Options | AutoCorrect | Uncheck "Capitalize first letter of sentences" and "Capitalize first letter of table cells".


(The Office Button in Microsoft Word 2007)

- (c) is changed to © automatically.

Depending on how you create lists, this may be the worst feature ever, or simply a handy way of adding a copyright symbol.

How to fix:

-Word 2000

Go into Tools | AutoCorrect | AutoCorrect | Select (c) in the list of replacements and click Delete.

- Word XP/2003

Go into Tools | AutoCorrect Options | AutoCorrect | Select (c) in the list of replacements and click Delete.

- In Word 2007

Go into the Office Button | Word Options | Proofing | AutoCorrect Options | AutoCorrect | Select (c) in the list of replacements and click Delete.

- Word hides menus you don't use regularly.


(Where did all my options go?)

This feature is called "Personalized Menus and Toolbars".

If you hadn't noticed, Microsoft Word has a lot of menus, and buttons, and options, and checkboxes… (You get the idea).

Rather than design a GUI that exposes the options more logically (Like the ribbon does in Word 2007), earlier versions of Word just hide the items you don't use to help you ignore their existence.

How to fix:

- In Word 2000/XP/2003

Go into Tools | Customize | Options | Check "Always show full menus"

- In Word 2007

There isn’t any need, as Word 2007 doesn’t have “Personalized Menus and Toolbars”.

- Word makes numbered lists automatically.

If you start off a line with "1." or "1)", Word by default will automatically start a numbered list for you. Typically this formatting looks good inside of Word, but it can have unpredictable results when copied and pasted outside of Microsoft Office.

How to fix:

- In Word 2000

Go into Tools | AutoCorrect | AutoFormat As You Type | Uncheck "Automatic numbered lists"

- In Word XP/2003

Go into Tools | AutoCorrect Options | AutoFormat As You Type | Uncheck "Automatic numbered lists"

- In Word 2007

Click on the Microsoft Office Button | Word Options | Proofing | AutoCorrect Options | AutoFormat As You Type | Uncheck "Automatic numbered lists"


(Unchecking the Automatic numbered lists feature in Office 2007)

- References:

lifehacker.com: Make Microsoft Word less annoying.

windowsdevcenter.com: Top Ten Word Annoyances
.

support.microsoft.com: How to turn off AutoFormat features in Word 2002 and in Word 2007.